Making Sails - The Basics
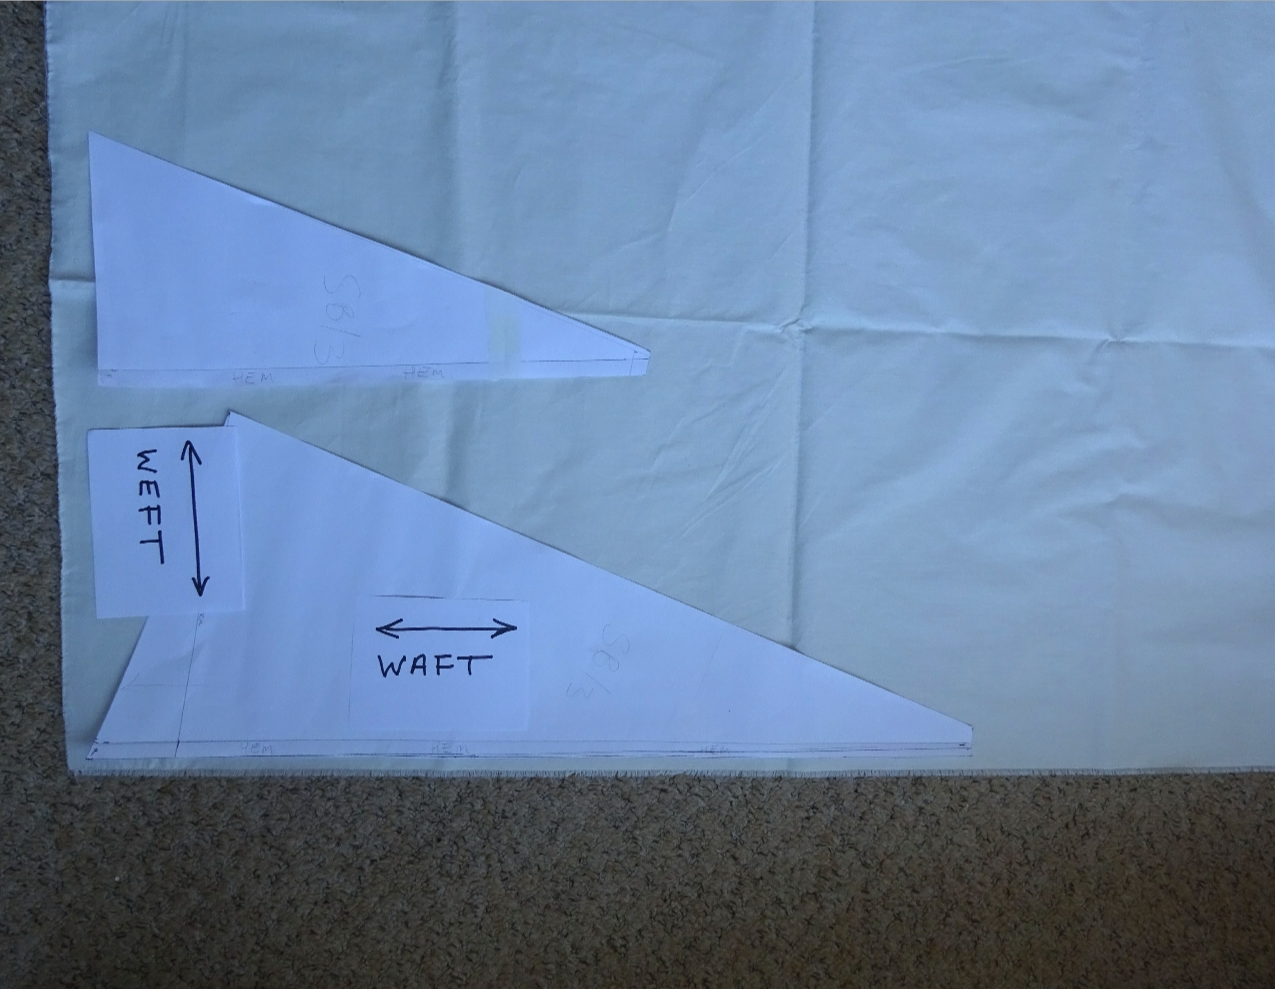
Cloth is woven on a loom, when you receive it, it will have the machine edge and a cut edge, the threads that run parallel to the machine edge are called "The waft" and the threads running across the cloth "The weft", it is important when cutting your sails that you know which direction it was woven in. The trailing (Rear) edges of your sails should always run with the waft, as the waft is stronger and does not stretch.
Make up your templates from existing sails or use the "Sail Templates" page as a guide, always cut out a paper template first and adjust to fit your spars if necessary, slight changes did occur over the years with earlier yachts tending to have larger sails than the later versions. Don't forget to add on the hem thickness to your template.
When laying out your cut templates on the cloth, do so as in the photo, the trailing edges on the sails I am making are to the bottom of the templates marked "Hem". (I've used SB templates as they only have one hemmed edge. Click on photo for larger view.)
Mark around the templates using a pencil so if you slip you can rub any marks off. If your lines are a bit wobbly, use a rule to straighten them up.
It's worth pressing the cut out sails with a hot iron to flatten them out, some stubborn creases will take a bit of sailing to get rid of them. At the same time, fold over the edges for hems, single hem for solid yachts and Endeavour series, double hem for the BR and SB series, the SB series has edging strips on the leading (Front) and bottom edges. Some people use an iron to press their hems flat as it aids when stitching. Hems on Star yachts, in the majority of cases, fold away from you when looking at the sail from the left hand side. Start on the bottom edge and stitch around all the sides to finish over the point where you started from. On some yachts a contrasting thread colour was used, yellow, blue, green or red.
Eyelets fitted were 1/8" or 3mm. Use the eyelets along with backing washers to stop any pull through.
**TOP TIP** If you are fitting a 3mm eyelet, use a smaller 2mm or 2.5mm hole punch on the material for a tighter fit on the eyelet.
General guide: When fitting your mainsail, start at the bottom front corner, tie or clip the sail to the mast/boom screweye or boom wire on the smaller SYs, then the rear corner to the end of the boom, tie any eyelets in-between to rings on the boom. Tie the top of the sail to the top of the mast, whether it is a drilled hole or screweye and then any eyelets down the leading edge to rings on the mast. for the SY gaff-rigged, tie any punch holes in the top sail edge direct to the gaff spar with thin cord.