How to rebuild an SY/7. Same procedure for the SY/6.
The SY/7 at 24" was the largest Birkenhead Star solid yacht to be purchased over the counter, if you are looking for one to buy, they are not that rare, they were sold in their thousands so don't go paying over the odds for something similar to the one I will be using, I paid about £30, the ones with the round stern appear to be more collectable. In general, I wouldn't advise someone to rebuild their yacht just for the sake of it. For this exercise I am using an incomplete SY/7 purchased off the internet with no masts or sails. Unless you know you have the skills to complete the task, do not go down this route, buy a complete yacht instead as this will give you everything you need and show you were everything goes.
In the factory the whole process of producing a yacht once it had finished being machined and sanded, including applying the many coats of paint would have taken about 4 days.
This rebuild was taken over several weeks.
First and foremost, whether you start with just a hull or rebuilding a complete yacht, take photos of everything, if you are unable to, make diagrams. It helps to make a deck plan diagram marking out were all the staples and fittings were. If you are taking measurements, start from the point of the bow. Have a small container to keep all the removed parts in.
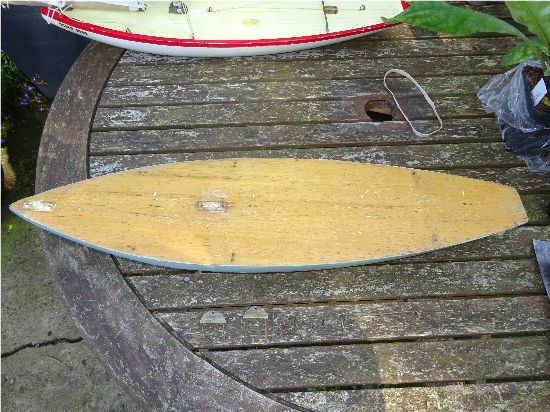
Below, a complete SY/7 and below it the much used hull for restoring.
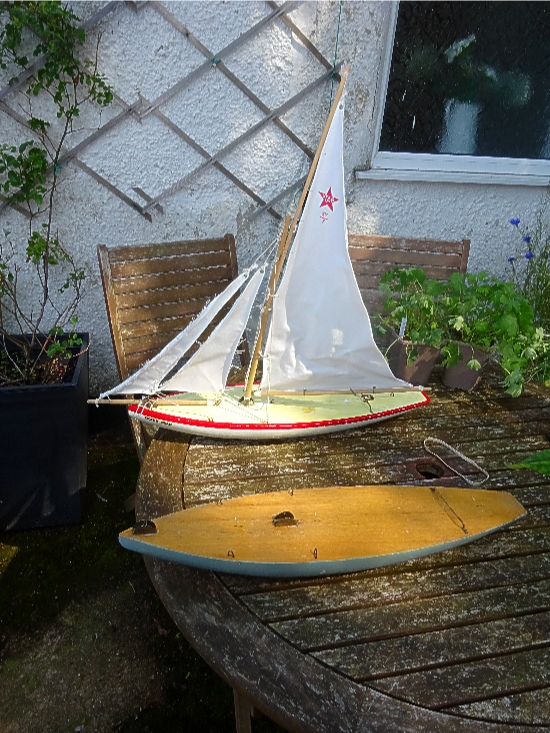
Definitely had lots of use with the deck stripped and varnished and the hull painted blue.
PART 1 - The Strip Down.
If you have masts and sails, undo / cut the sail cords and remove the mast pins to enable you to remove the complete assemblies. You will need to bend the end screw eye open to remove the bowsprit.
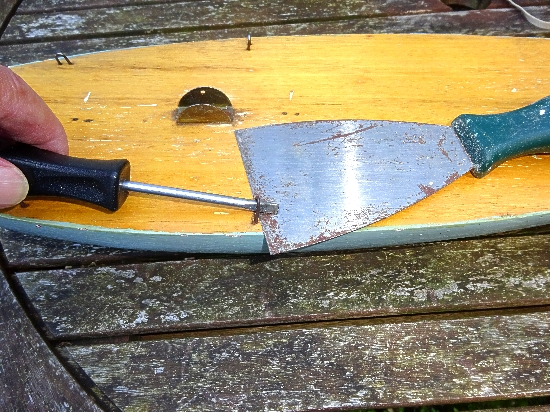
After taking note of all the fittings, in my case, mast mounts, staples and rear sheet horse, proceed to remove everything. Using a paint scraper and a narrow bladed screwdriver pass the screwdriver through the staple and rest on the blade of the scraper, gently lift the staple out. Depending on how long and what condition the staple is in, you may need a lot of force. If the staple is weak and snaps, try removing with pliers or trim back to deck level with wire cutters and use a pin punch to drive the cut ends just below deck level. If the staples are rusty, they may bring a small amount of surrounding wood out with them, this happens, don't panic as the holes can be filled and the staples re-sited. The layout of the staples was done be eye in the factory and most yachts have them fitted asymmetrically, i.e. not mirror image, so to re-site the staples an 1/8" away will not look out of place. Remove the rest of the staples.
** For the next part, wear eye protection as force will be applied to the pins which
can sometimes sheer their heads.
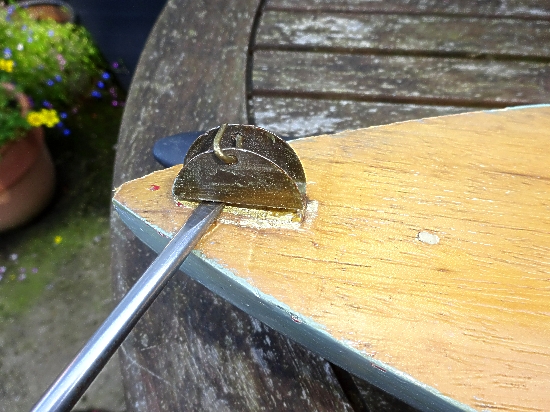
Using a scraper, insert the corner under the mast mount, try to lift it up at one end. It may not move so continue to use force even if the mount starts to bend inwards, any distortion can be straightened out later with pliers. In my case the mounts had been off before and were refitted with longer pins which needed excessive force to remove. Again do not worry if some surrounding wood comes out with the pin.

Do the same for the second mount. As the mount lifts you may need to use a thicker screwdriver to help separate from the deck.
Moving on to the sheet horse, use the same procedure and insert a scraper under on end, the pins on the horse are quite small and should come out easily - or snap off!
Below the bare deck.
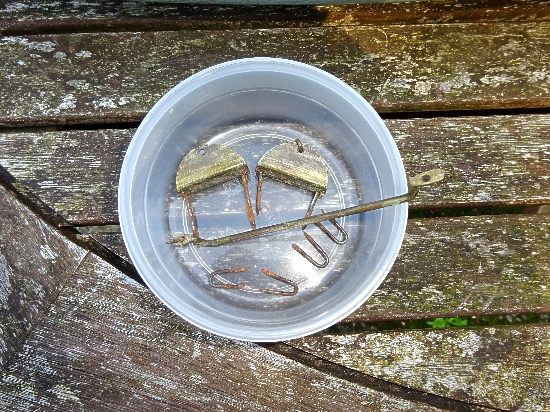
Don't forget to keep your bits and pieces safe. ** Note the oversize pins on the mast mounts which will be changed when refitted.
The next part is to remove the paint, sand back the varnished deck, repair any holes and apply undercoat, that will be covered in detail in;