How to rebuild an SY/7
PART 2 - The Hull Preparation.
Not knowing the history of the yacht and because the hull has been covered in a thick layer of blue paint, I had decided to strip the paint right back to see if there was any hidden nasties. If your yacht is just being freshened up then there is no need to go to this extreme and all that is probably needed is a light sanding with fine rubbing paper.
If you are using paint stripper, wear gloves and find somewhere out the way to do it as it can be messy. I used to use Nitro Moors but that has changed in recent years and is nowhere near as effective as it used to be, here I am using one of those new aerosol spray strippers "Hycote", just as good.
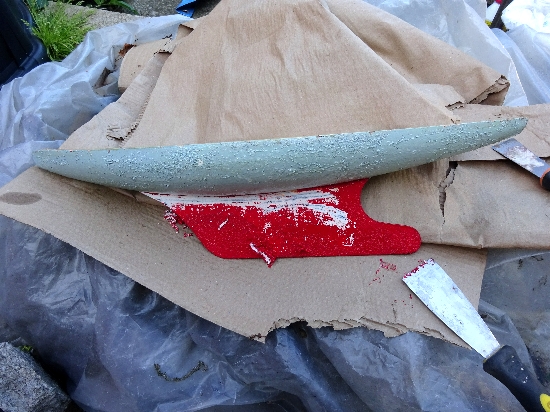
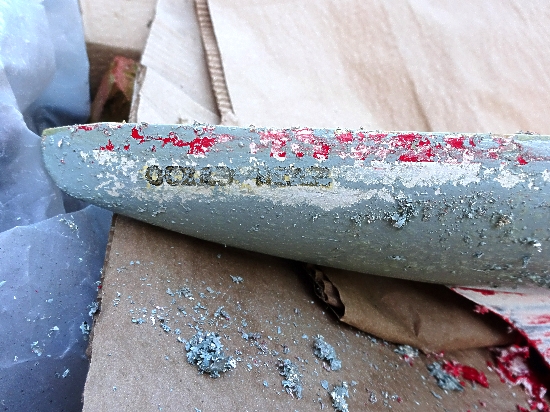
With a second spray and scrape, I was able to see the original white / red paintwork and the name "OCEAN STAR", note the red keel is original paint and dates the yacht between the years 1988 / 90, earlier models have a white keel.
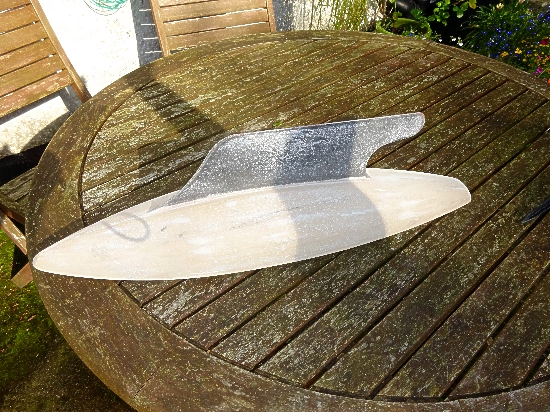
Half an hour later and a few more sprays, I was down to the original undercoat and I left it there as there was no sign of any hidden damage. I also removed the deck varnish. A good rinse with water and left to dry thoroughly. My intention now is to rub back the undercoat gently with fine wet & dry paper and to remove the remaining traces of varnish initially with a flat sander as the deck area around the front mast mount is uneven, to be finished off with hand block sanding with a front to back sanding motion so as not to leave rub marks across the deck wood grain.
**Tip. If you rinse your yacht when it has been stripped of paint, make sure you dry it quickly and keep it somewhere dry as damp will cause the bare wood to turn black and you cannot get this staining out.**
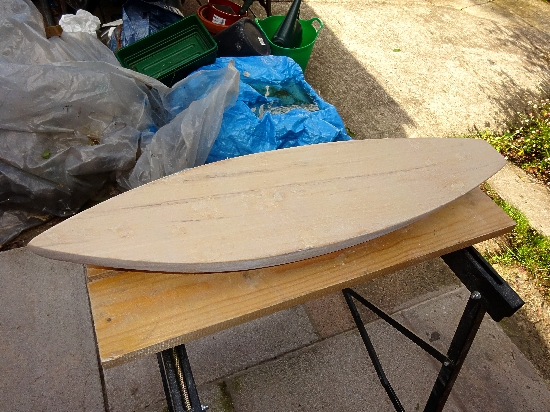
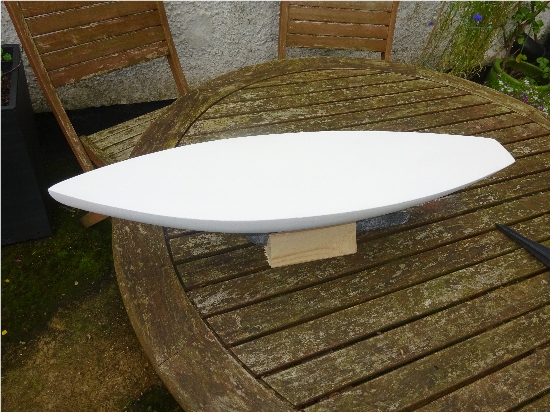
Below, the bare hull waiting for final fine sanding.
With that done, it is now time to repair any defects on the hull and decking. I use Ronseal Natural wood filler which is about as good as it gets. Light coloured and fast drying. Apply to the areas that need attention and then leave until the next day, don't rush, sand back and apply another coat if necessary and leave again before sanding back. If you have cracks around the keel plate use the same filler for this.
I decided to fill all the staple and pin holes.
After sanding, when happy with the repairs apply an all over thin coat of white undercoat and leave until the next day to allow to dry thoroughly, you will then be able to see if any further sanding or repairs need doing. When happy, apply another thin coat of undercoat and leave to dry.
The keel on my yacht turned out to be in good condition with no rust but as a safeguard, I decided to give it two coats of Hammerite Ku-Rust to stop any rusting in the future. This dries very quickly with a blue / black finish which needs a couple of coats of primer applied to hide.

At his stage I gave the mast mounts a rub down and two coats of varnish.
The next part is about applying the paint and replace the deck fittings.